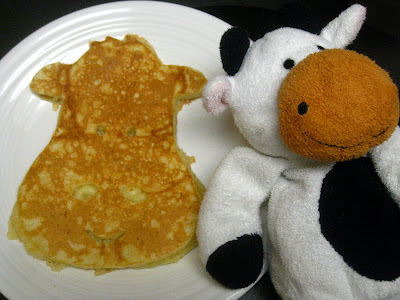
Breakfast Week continues!! We love buttermilk pancakes. Blueberries, chocolate chips, strawberries, and warm maple syrup can only make them better. But do you know what makes them the best? Shaping them like farm animals!!! When we were at our local Williams-Sonoma we saw these and knew we had to have them. Luckily, the pig's mom saw our faces too and bought them for us. We were going to use a recipe that we had found online, but there was a recipe right on the package of the molds that was almost identical, so we followed that instead. This recipe is also a tutorial on using these fantastic molds.
ingredients
2 eggs
2 c flour, sifted
3 Tbsp sugar
2 tsp baking powder
1 tsp baking soda
1 tsp salt
2 1/2 c buttermilk
4 Tbsp unsalted butter, melted
1/2 tsp vanilla
nonstick cooking spray
instructions
1. Beat the eggs until frothy. Add the flour, sugar, baking powder, baking soda, salt, buttermilk, butter, and vanilla. Stir until the batter is smooth and not lumpy.
Cal's tip: Making this pancake batter is very easy. It's a great, simple recipe. Making them look like farm animals is slightly more complicated...
2. Heat a griddle over medium heat. Lightly grease the griddle and the thoroughly grease the molds.
Cal's tip: Greasing the molds is very important. They are definitely not non-stick. Be sure to scrape off excess batter and re-grease between each pancake. Trust us - we found out what happens when you don't do this.
3. Set the molds on the griddle, with handles up, and heat.
Cal's tip: This is a good time to prep all the utensils and things you will need. We recommend: 1/3 c and 1/2 c, spoon to get batter out of cups, knife to spread batter, spatula to flip pancakes, tongs to remove molds, spatula to scrape batter from bowl, plate to set hot molds, plate for finished pancakes.
4. Pour about 1/3 c batter into the chicken and pig and 1/2 c batter into the cow. Using a butter knife, spread the batter into the corners of the mold.
Cal's tip: These measurements are very accurate! The first batch we did we filled them up more and it made them messy.
5. Heat on this side until bubbles are forming in the middle, about 2 minutes. Remove the molds and flip.
6. Cook until golden on the other side, another 2 minutes.
Then, your pancakes are all done! The recipe made a very nice fluffy pancake. We actually bagged them in sets of 2 and reheated them during the week for breakfast. We made them Monday morning, and they were very good Tues-Thurs, but definitely losing their texture by Friday. Still, it was nice to have a hot meal in the mornings. This recipe would also work well by adding blueberries, chocolate chips, or whatever else to the batter. We just wanted plain pancakes since we were using the molds.
The process of the molds is long and messy. We recommend doing your first molds slowly, maybe even one at a time to get the hang of it. The pictures above and below are from our first batch, which as we mentioned was over-filled and messy.
The second batch, we didn't clean out and re-grease the molds, which made some of them cook too long while we struggled to remove the molds and flip them.
The third batch came out the best, because we did them individually. In the end, the pancakes look like farm animals, so it is clearly worth the extra work! Here are some more pictures of us posing with our beautiful pancakes for your enjoyment.
Moo!


looooook how cute - your site's signature breakfast:)
ReplyDelete